Getting Started
Installation
-
Install Jekyll via their official instructions.
-
Fork the avalanche repository, install dependencies, and start the jekyll server:
 git clone https://github.com/<your-github-account>/avalanche.git && cd avalanche
 bundle install
 bundle exec jekyll serve
Create a new blog post
- Create a (markdown) file in the
_postfolder:bundle exec jekyll post <title-to-your-post>It will automatically create the file in the
YYYY-MM-DD-<title>.mdformat. - Edit the content in
YYYY-MM-DD-<title>.md, just like what you do in any other markdown files.- The markdown files contains some metadata, which is known as the Front Matter.
- Math symbols and equations are also supprted, e.g.,
  $$
  \frac{\partial (\rho u_{i})}{\partial t} + \frac{\partial[\rho u_{i}u_{j}]}{\partial x_{j}} = -\frac{\partial p}{\partial x_{i}} + \frac{\partial \tau_{ij}}{\partial x_{j}} + \rho f_{i}
  $$
will render
Publish the website via Github Pages
-
Test the changes locally and ensure it works properly
- Commit the changes and push them to Github
- A github workflow will run and generate website in a separate branch
gh-pageson Github
- A github workflow will run and generate website in a separate branch
- Configure the Github page settings:
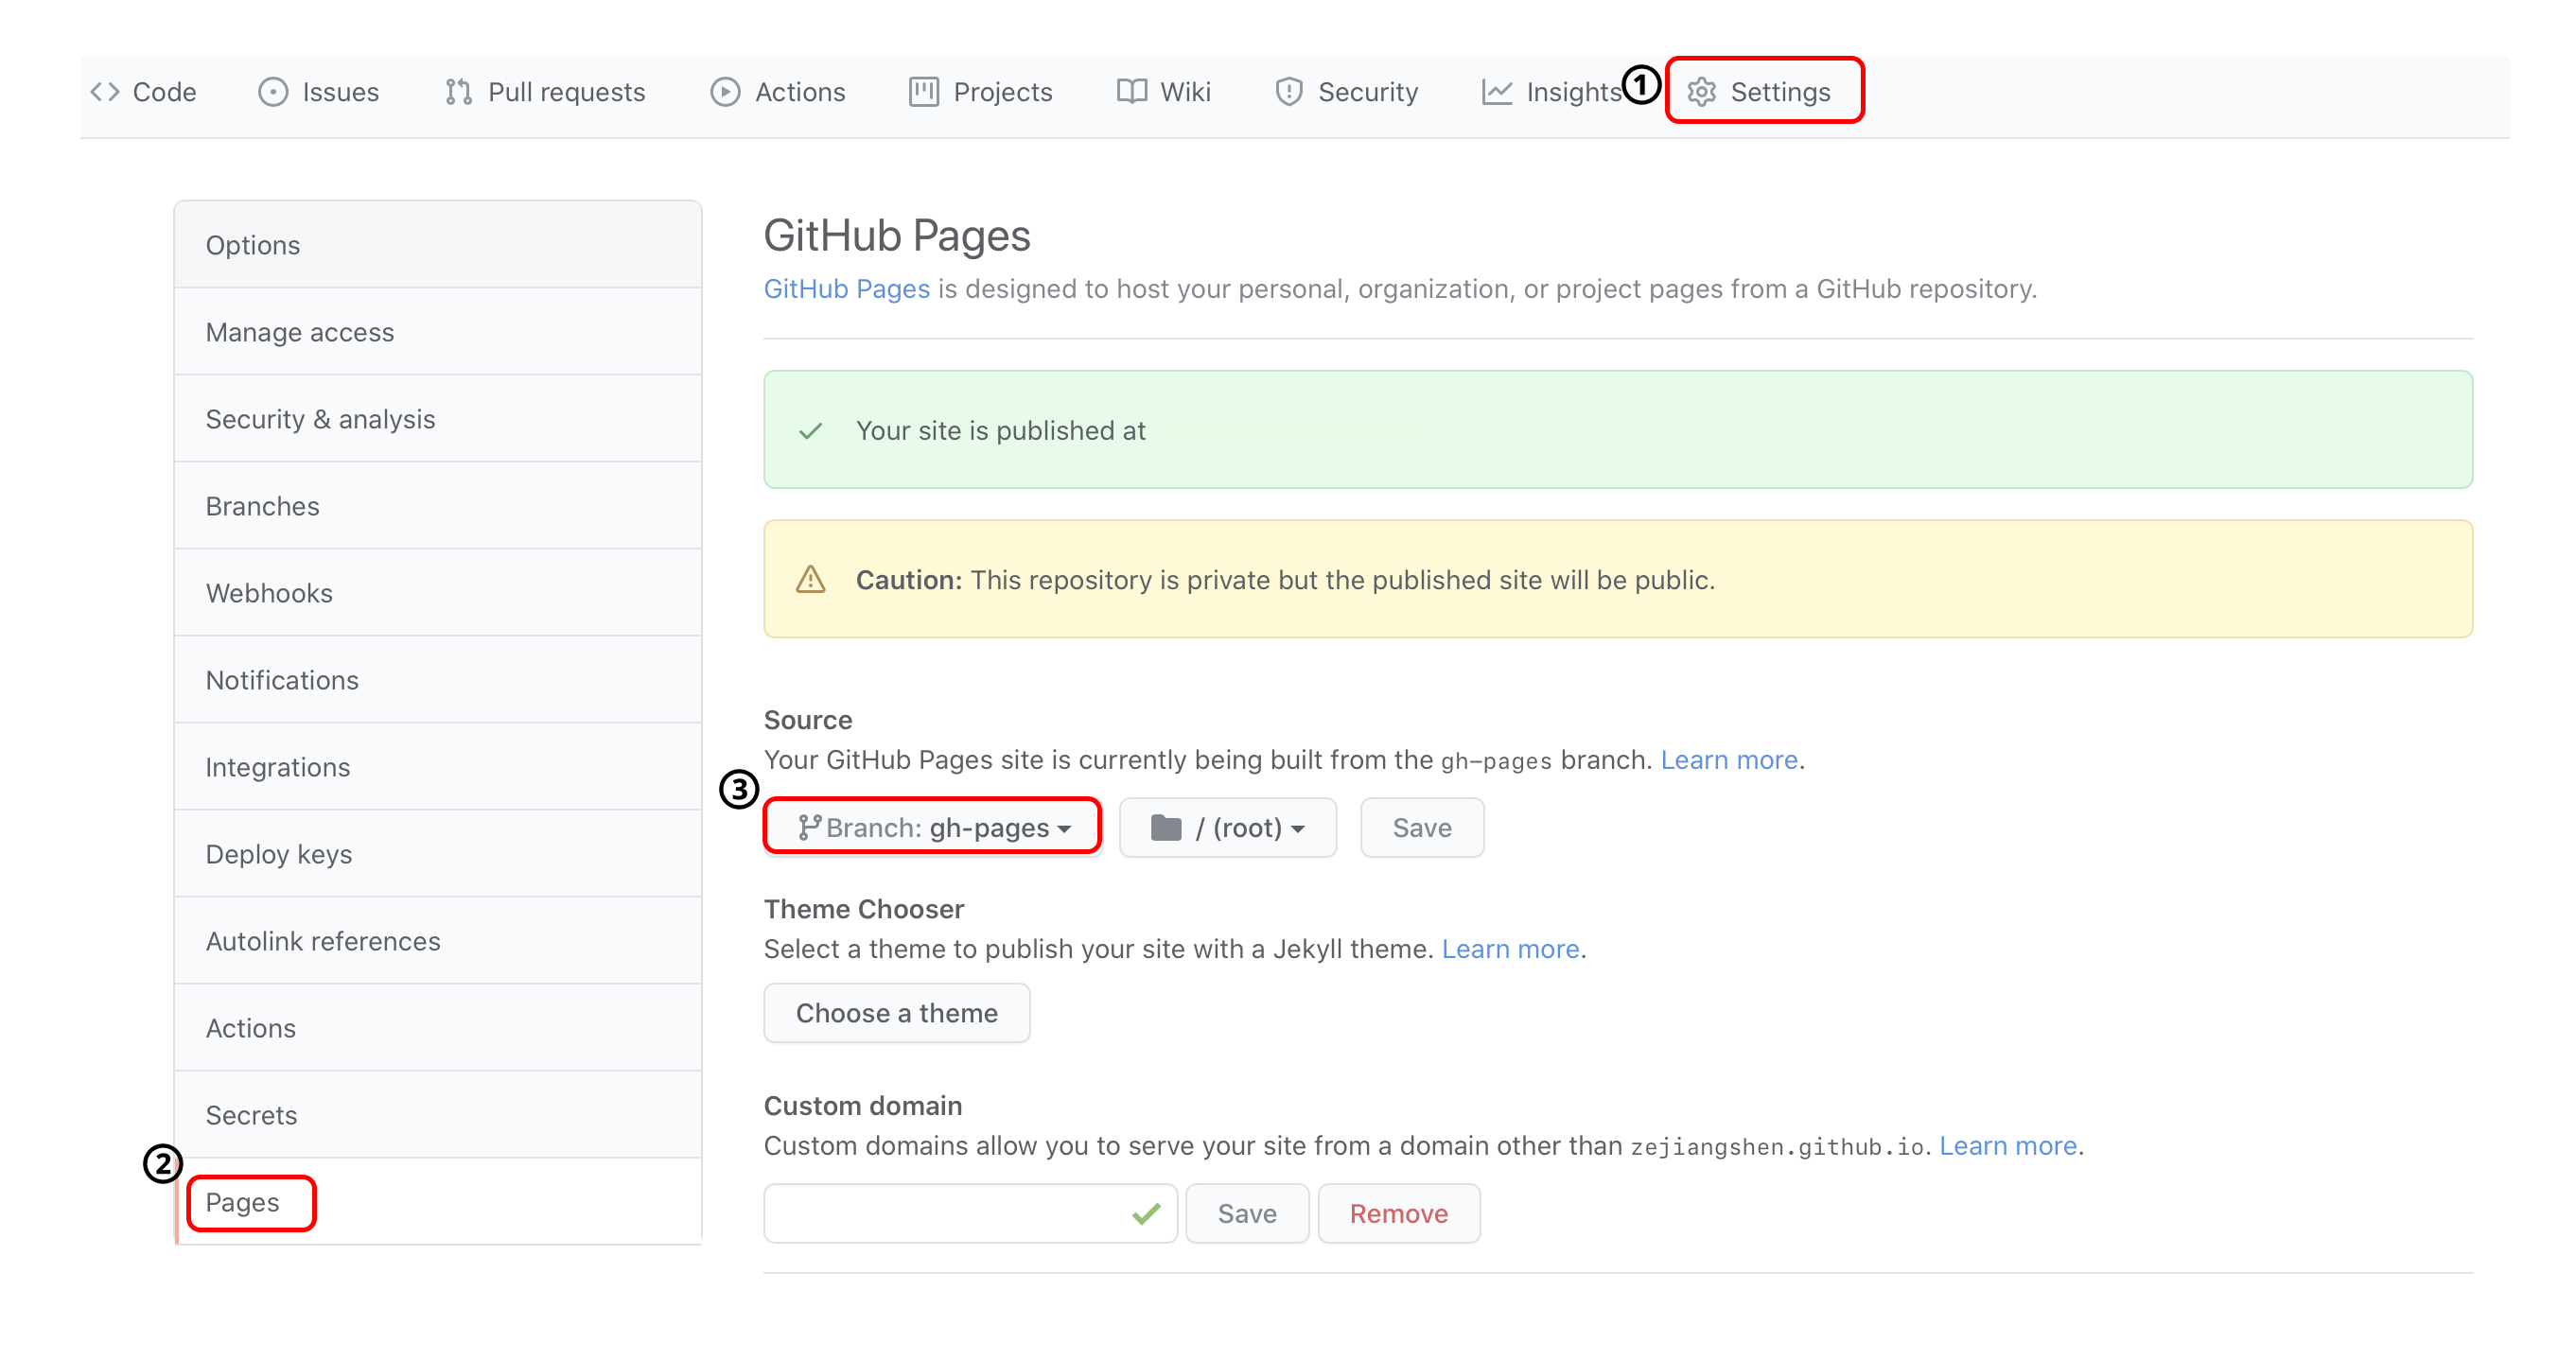
- Go to your github repo website
https://github.com/<your-github-username>/avalanche, and open the setting: - Go to the
Pagespage on the left panel - Change to use
gh-pagesbranch to publish the website
- Go to your github repo website
- Wait for a while and the site should be ready via
<your-github-username>.github.io/avalanche
Optional
- You can rename your Github repo from
avalancheto<your-github-username>.github.ioon Github, and the site will be published at<your-github-username>.github.io/instead.